

In the last post I established a handful of things to consider in setting up a “blogfoliosume” (I should copyright that…) and promised a few more articles digging into the details. But before we go there it occurs to me that I should outline a few key parts of web design first, and hopefully dispel any trepidation you might feel on the more complex paths I’ll explore.
My primary audience here are my peers out there in the Learning & Development field, especially Instructional Designers creating e-learnings. And in my experience many instructional designers don’t realize this very important fact: You are a web designer! When you’re authoring e-learning content, you are doing web design. Whether you use Storyline, Rise, Captivate, Lectora, et al, you are creating HTML, CSS, and JavaScript files – a website! You’re just using a visual editing tool (or WYSIWYG) designed for a specific purpose.
E-learning design is web design!
I hear you saying “But Charles, I don’t write code!” Maybe not directly, but neither do many web designers! In web design and development there are various roles: Some people consider themselves “front end” or “back end” developers, creating the user interfaces on websites vs programming the servers and databases that power them. There’s a whole class of “full stack” developers who do both. And there are those focused purely on visual design using tools like Figma, Adobe Creative Cloud, et al. In most cases those designers than hand off their designs to the front end developers to implement – But in our case the tools do that for us!
Want more proof?
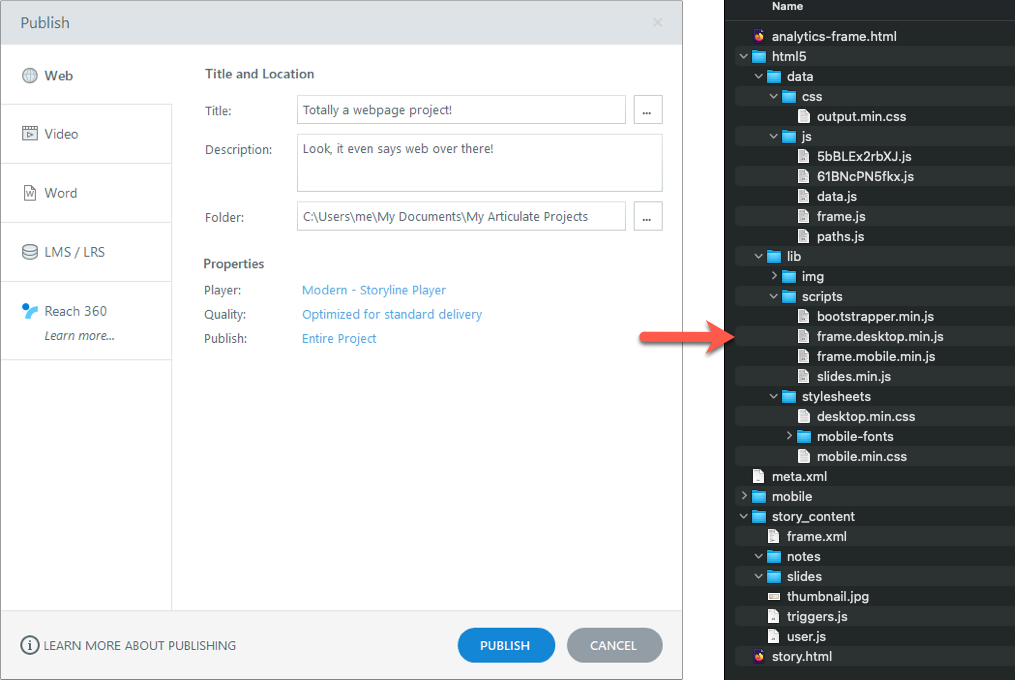
See these files output by Storyline? It’s HTML, CSS, and JavaScript (.js); this trio makes up the front end of all modern websites regardless of how they are built. The structure of the files is a bit atypical and the code is not super user friendly to read through, but that’s typical of most WYSIWYG tools. Hypothetically you could write all the code by hand and produce the exact same thing without even needing a design tool, goodbye Articulate 360 subscription! (Not that I’m actually suggesting that.)
I hear you asking questions again, “But what about SCORM? What about the LMS?? Won’t somebody please think of the LMS?!?”. Chill out, it’s all good! Also you forgot to worry about xAPI. Poor xAPI, always the afterthought.
For our purposes those things don’t matter. An LMS is just a specialized web server in the first place, with tools in place to handle things like learner registrations, enrollments, and reporting. SCORM is a standard, a common shared set of rules, for communication between an e-learning course and an LMS. Again, you could manually write the HTML/CSS/JavaScript for a course and manually incorporate the SCORM standard (seriously, have a go at the 102 page documentation next time you’re bored) and it would work fine on any standards-complaint LMS. But let’s not do that.
Since we just want to let potential clients and employers check out how awesome our work is, we don’t need all those special tools on an LMS, and therefore SCORM is irrelevant as well. And since we’ve established that all an e-learning design tool is creating is the same code files as any normal website, all we need is a normal website host and we can approach this whole thing as a web design project! See? We’ve come full circle!
Fine. So, what is a website anyway?
The internet, or “Information Super Highway” for those of us who survived the 90s, is complicated. But at the same time, it’s actually not. The huge, powerful, interactive web apps we all use each day aside, a website is actually a pretty simple thing if you break it down. A basic website is a set of text files written in a standardized format (AKA code), literally each page of a site is a file. Those files live on a special computer that serves them to you (AKA the server) when you ask for them (by visiting the URL). Your browser knows how to read the code and show you the content (AKA render the page). That’s it. Seriously, try this:
- Open your most basic text editor (Notepad on Windows, TextEdit on a Mac. Make sure it’s set to plain text.).
- Just type some text. “Hello world!” is the classic.
- Save it as
index.html(doesn’t matter where so long as you can find it). - Double click the file.
What happened? Your browser opened and showed you what you wrote. Congrats, you made a webpage! And we didn’t even write any code (yet…).
About that code
Despite that ominous “yet…”, I’m not trying to trick you into a code tutorial, there are far better resources out there for that already (I’ll share some at the end of the article). But I do want to define some things here to help with the context of our blogfoliosume (I’m dropping the quotes, it’s a real word now) project. I’ve mentioned them a few times already: HTML, CSS, and JavaScript. Let’s break them down in a way that’s useful to us in our e-learning context.
HTML
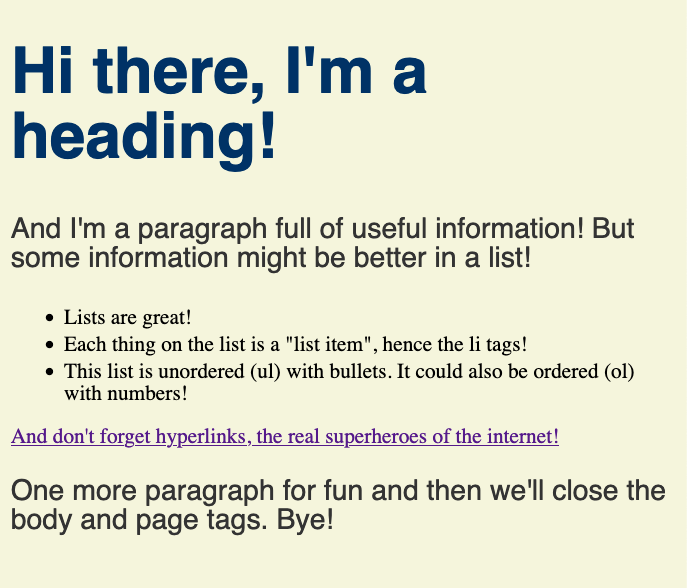
HTML defines the structure of a page, it’s the “bones” if you will. It’s also where the actual content is, your words and pictures are in the HTML. You can think of HTML as code that defines the structure you expect in any word processor, saying things like “this is a paragraph”, “this is an image”, “this is a table”, etc. It does so with tags using angle brackets that look like this: <p>This is a paragraph.</p>. Here’s a simple example of some HTML and the page it creates:
<html>
  <body>
    <h1>Hi there, I'm a heading!</h1>
    <p>And I'm a paragraph full of useful information!  But some information might be better in a list!</p>
    <ul>
      <li>Lists are great!</li>
      <li>Each thing on the list is a "list item", hence the li tags!</li>
      <li>This list is unordered (ul) with bullets. It could also be ordered (ol) with numbers!</li>
    </ul>
    <a href="">And don't forget hyperlinks, the real superheroes of the internet!</a>
    <p>One more paragraph for fun and then we'll close the body and page tags.  Bye!</p>
  </body>
</html>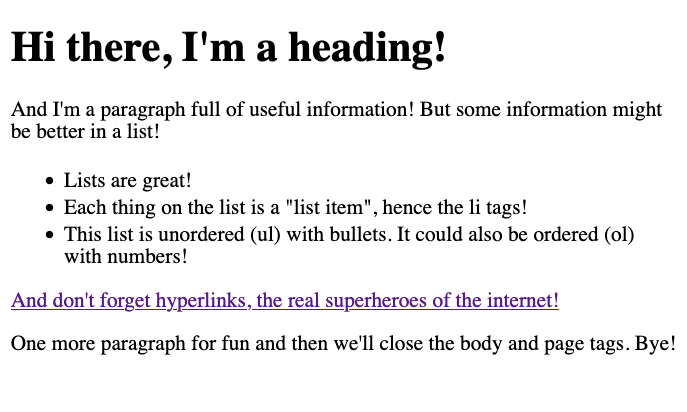
As I said, not attempting to teach HTML here, but I hope that illustrates the idea that the HTML is just structure and content. You’ll also notice it’s pretty easy to read, but lacks any real design elements. Modern HTML practices try and avoid things like visual style, that’s the job of our next stop, CSS!
CSS
CSS stands for “Cascading Style Sheets” and can get pretty complicated, but it’s the language where a lot of that visual design we love comes from! CSS defines the styles and formatting of the webpage content. Fonts, colors, backgrounds, etc are all defined in the page’s CSS. Also layout things like how much space there is between elements or whether things should go on the right or the left are defined by CSS.
So when you select your slide heading in Adobe Captivate and set it to be 36pt Helvetica in a nice dark blue, set your paragraphs to be 16pt not-quite-black, and decide the whole slide should have a nice cream background; Captivate wrote this for you:
h1 {
  font-size: 36pt;
    font-family: 'Helvetica';
    color: #003366;
}

p {
  font-size: 16pt;
    font-family: 'Helvetica';
    color: #333333;
}

body {
    background-color: #f5f5dc;
}
You’ll notice the list and link were not affected because my example didn’t “target” them. That’s where CSS can get complicated; there are considerations about specificity, parent/child hierarchies, IDs and classes, and much more that goes into styling an entire site. But again, just want the concept to stick here: CSS is for style and formatting.
JavaScript
Now the big boy. JavaScript (it actually has no relation to Java, don’t get them confused!) is what powers dynamic interactivity on the modern web. Whenever a website does something other than just show you something, JavaScript was involved. If you click and something changes without reloading the page? JavaScript. Something pops up? JavaScript.
JavaScript is its own profession, but it’s also really critical to us because all that interactivity we count on in e-learning is powered by it! In fact I would argue that the difference between a beginner in e-learning and an expert is awareness of how JavaScript can be used in our tools! Both Storyline and Captivate have powerful JavaScript features under the hood, and using them is the key to taking your content to the next level! Many future articles will be around doing just that. But for now, the simple demonstration:
<button onclick="toggleList()">Toggle List</button>
...
<ul id="example">
function toggleList() {
        var list = document.getElementById("example");
        if (list.style.display === "none") {
          list.style.display = "block";
        } else {
          list.style.display = "none";
        }
      }
Here I’ve added a button to our original HTML and given our list an ID to make it easier to target with the JavaScript. When the user clicks that button it runs a function that basically just changes the other code, adding CSS styles that either hide or show that particular element. It uses if/then type logic to decide what to change. Again, that’s literally what your design tool is doing too!
One last really important thing about all this code: Everything we’re talking about here is “front end” (AKA “client side” AKA “it’s all downloaded to your computer when you visit the page and doesn’t require the server to do anything special”). This is critical as we start talking about solutions in the next articles. If we needed “back end” functionality (AKA “server side” AKA “stuff that happens on the server before the page is even sent to you or after some trigger”) then we’d need different solutions than we’ll be talking about.
If you want see those examples combined, or even edit them to see what happens, they are here: https://codepen.io/charlesofalltrades/pen/zYQRKMw
Final thoughts
This article went a bit different than I initially intended, but I hope it still had value. If nothing else I hope it encourages you to start thinking like a web designer, because after all, you are!
Key points:
- E-learning design IS web design!
- Your e-learning design tool is creating a web site, creating the same code you could write manually.
- HTML provides the structure of a web page and is where the content lives.
- CSS provides the styling, formatting, and layout of a web page.
- JavaScript adds interactivity and is a powerful e-learning tool.
- And because of all that, we can approach our portfolio project as a website building project!
Resources
Want to actually learn all that code stuff? Here are my suggested ways to do so:
- Interactive:
- FreeCodeCamp is an outstanding (and free!) resource for interactive learning. You can see the lesson, write your own code, and see your results all at the same time! Feel free to pick and choose lessons if you are just trying to wrap your head around the basics, or do then entire curriculum and earn a certification!
- Codecademy is similar but not entirely free. However they do have many free intro lessons and tend to be more entry level than FreeCodeCamp, which can feel overwhelming if you are starting from scratch.
- Video Based (These are all from LinkedIn Learning, which I am a big fan of. If you don’t get it through work, check your library, many have free access available!):
- Practical HTML for No-Coders – This is a great course for absolute beginners, I encourage you to take it even if you take nothing else on this list!
- CSS Fundamentals: Unlock the Power of Web Styling – CSS can get so complex that even an introductory course can go too deep. This one’s not too bad, but feel free to skim some of it since you are not likely to write full stylesheets from scratch in the e-learning world.
-
Programming Foundations: Fundamentals (2011) – I owe my career to this course. Some day I’ll explain that further, but for now know that it comes with the highest endorsement I can give. It teaches basic programming concepts and uses JavaScript as its example language, which makes it perfect for our purposes. Plus I could listen to Simon’s voice all day. However, it is older and not considered current anymore, so maybe I shouldn’t recommend it as much as I do.
- Programming Foundations: Fundamentals – This is the current programming intro course, and it is excellent. Unfortunately it uses Python rather than JavaScript as its example language, which makes it not very applicable to our use case.
- Learning the JavaScript Language – I like this course for JavaScript specifically, but like the CSS course it can too much for just beginning.
- Text Based (If you prefer to read!)
- The Odin Project is an incredible open source collection that does a great job of introducing concepts before diving into technicalities.